Installing a gate in a fence can instantly improve your property’s access, function, and curb appeal. Whether you want a cozy garden entrance or a secure driveway gate, learning how to install a gate in a fence is the first step. This easy guide breaks the process down for beginners, making the project simple and achievable.

A well-installed gate offers both practical benefits and visual charm. From choosing the right materials to measuring, digging, and attaching hardware, proper planning ensures a smooth outcome. If you are ready to upgrade your fence with a stylish and functional gate, follow along and get started with confidence.
Tools and Materials Needed for Installing a Gate
Equipping oneself with the right tools and materials is crucial for a successful gate installation. Without the proper equipment, even the most straightforward tasks can become cumbersome. Here’s a comprehensive list of what you will need:
Tools
- Measuring Tape: Accurate measurements are the foundation of any successful installation.
- Level: Ensures that the gate is perfectly aligned.
- Post Hole Digger or Auger: Essential for setting the gate posts securely.
- Saw: For cutting wood or metal, depending on the material.
- Drill and Bits: Necessary for attaching hinges and other hardware.
- Screwdriver: For securing screws and bolts.
- Hammer: Useful for nailing or tapping components into place.
- Wrench Set: For tightening bolts and nuts.
Materials
- Gate Kit: Typically includes the gate panel, hinges, latch, and any decorative elements.
- Posts: Should be strong enough to support the weight of the gate.
- Concrete Mix: Used to anchor the posts firmly in the ground.
- Hinges: Determine the ease and direction of gate movement.
- Latch or Lock: Provides security and closure.
- Wood or Metal Filler: For any adjustments or repairs.
By gathering these tools and materials in advance, installers can ensure a more streamlined process. It’s always wise to double-check that all components are in good working order before beginning.
Choosing the Right Location for Your Gate
Choosing the right gate location is key for both looks and function. It affects how easily people move through, so plan carefully for smooth access and good design.
Purpose and Traffic Flow
Decide if your gate is for people, cars, or both. A gate used often needs strong support and easy, clear access.
Topography
Check if the ground is flat or sloped. Flat surfaces make installation easier, while uneven ground may need extra prep or leveling.
Surrounding Structures
Look at nearby fences, trees, or walls. Your gate should fit in well with everything around it for a clean, natural look.
Visibility
Place your gate where you can see it. This makes it safer, especially for kids and cars coming through.
Mark the Spot
Once you pick a location, mark it with string and stakes. This helps you see the gate’s size and check space issues.
Smooth Installation Start
A good layout saves time and avoids mistakes later. It also makes sure your gate looks great and works as it should.
Picking the right gate spot is key for a smooth setup and long-term use. Take your time, plan well, and enjoy the results.
Measuring and Marking for Gate Installation
Accurate measuring and marking are fundamental to a successful gate installation. Mistakes in these early stages can result in a misaligned or non-functional gate, so precision is paramount.
Steps for Accurate Measurement:
- Measure the Width: Determine the width of the gate opening. This should include space for hinges and the latch mechanism.
- Height Considerations: Decide on the desired height of the gate, ensuring it matches or complements the existing fence.
- Post Placement: Mark where the posts will be installed, taking into account the gate’s swing and clearance.
Tips for Marking
- Use a pencil or chalk to make temporary marks that are easy to adjust.
- Ensure all lines are straight and true by using a level and a string line.
- Double-check measurements to prevent errors. It’s often said, “Measure twice, cut once.”
Accurate marking helps you see the gate’s placement clearly and ensures parts fit well. This step avoids mistakes and makes the rest of the installation much easier and faster.
Step-by-Step Guide: How to Install a Gate in a Fence
With all preparations complete, it’s time to move on to the actual process of how to install a gate in a fence. Follow these simple steps for a clean, professional finish.
Step 1: Install the Posts
- Dig Post Holes: Use a post hole digger or auger to create holes deep enough to support the gate’s weight. As a rule of thumb, about one-third of the post’s total length should be set below ground.
- Set the Posts: Set the posts level in the holes, then pour concrete to hold them in place. Allow the concrete to harden completely before continuing with the installation process.
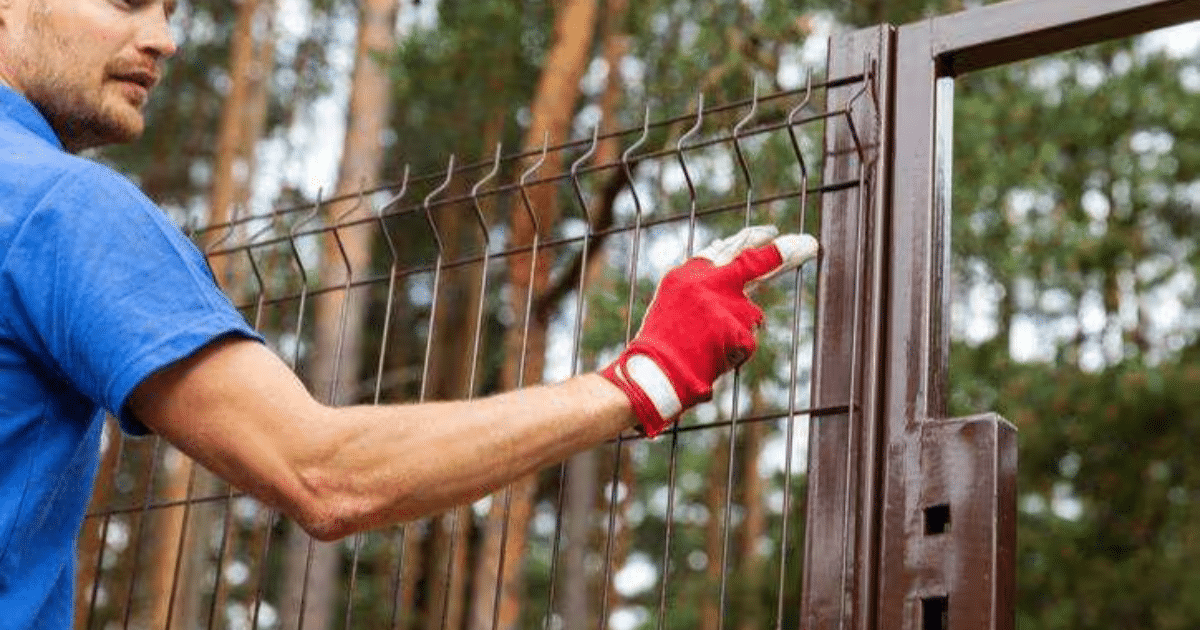
Step 2: Attach Hinges to the Gate
- Position the Gate: Use blocks or a helper to hold the gate in the desired position.
- Secure Hinges: Fasten the hinges to the gate by drilling them into place. Ensure they are aligned with the hinges’ corresponding mounts on the post.
Step 3: Hang the Gate
- Align with Posts: Lift the gate and align the hinges with the post mounts.
- Secure the Gate: Mount the gate to the post by firmly attaching the hinges. Check for even spacing and smooth operation.
Step 4: Install the Latch
- Position the Latch: Mark the position where the latch will be installed. Ensure it aligns properly with the receiving end on the post.
- Secure the Latch: Attach the latch using screws, ensuring it functions smoothly.
Final Checks
Test the gate to ensure it swings freely and closes securely. Make any necessary adjustments to the hinges and latch.
By following these steps, even beginners can install a gate that looks great and works well. Each part of the process leads to a strong and good-looking result.
Tips for Ensuring a Secure and Functional Gate

To achieve a balance of security and functionality, consider the following expert tips. These insights will help maintain the integrity of the gate while ensuring ease of use.
1. Regular Maintenance
Check your gate’s screws, bolts, and hinges regularly. Tighten anything loose to keep the gate secure and working smoothly over time.
2. Weatherproofing
Use sealant or paint to protect wood from moisture and warping. For metal gates, choose rust-resistant finishes to prevent long-term damage.
3. Adjustable Hinges
Install adjustable hinges to make small alignment fixes easier. They help keep your gate level and swinging properly without needing major repairs.
4. Gate Stops
Install a gate stop to control the swing distance of the gate. This prevents stress on the hinges and keeps your gate from hitting anything.
5. Security Features
Boost your gate’s security with a latch lock or padlock. It helps keep your property safe and adds peace of mind.
These measures not only extend the life of the gate but also ensure it operates smoothly and reliably, providing peace of mind to the homeowner.
Common Mistakes to Avoid When Installing a Gate
Even with the best intentions, mistakes can happen. Being aware of common problems can help avoid unnecessary complications during gate installation.
- Improper Measurements: Failing to measure accurately can lead to misalignment and a gate that doesn’t fit properly.
- Ignoring Terrain: Not accounting for slopes or uneven ground can result in a gate that doesn’t open or close smoothly.
- Inadequate Post Support: Skimping on post depth or concrete can lead to instability and sagging over time.
- Overlooking Hardware Quality: Low-quality hinges and latches may not withstand regular use, leading to frequent repairs.
By recognizing and steering clear of these errors, installers can save time, effort, and resources, ensuring a successful outcome.
Maintenance Tips for Your New Gate
Once installed, maintaining the gate is essential to ensure long-term functionality and appearance. Regular maintenance not only prolongs the life of the gate but also enhances its performance.
1. Inspect Regularly
Regularly inspect your gate for signs of rust, cracks, or any other damage. Catching these early helps prevent bigger problems and extends your gate’s life.
2. Lubricate Moving Parts
Use a good lubricant on hinges, latches, and other moving parts. This keeps everything working smoothly and prevents squeaking or sticking over time.
3. Clean and Paint
Wash off dirt and debris, then repaint or reseal your gate when needed. This protects it from the sun, rain, and other outdoor elements.
4. Check Alignment
Make sure your gate swings straight and closes properly. If it’s off, adjust the hinges or posts to fix any misalignment right away.
Consistent maintenance will keep the gate looking its best and functioning smoothly, providing lasting value and satisfaction.
FAQs About Installing a Gate in a Fence
How wide should a fence gate be?
The width of a fence gate depends on its use. For walkways, 36 inches is standard. A width of 10 to 12 feet is ideal for most driveway gates. Always measure carefully to allow space for hardware and gate swing.
What is the easiest way to install a wooden fence gate?
The easiest way to install a wooden fence gate is to preassemble the gate frame, set strong posts in concrete, and then attach hinges and a latch. Pre-cut lumber and ready-to-use kits help make the process faster and beginner-friendly.
Should a fence gate open inward or outward?
Most fence gates open inward for better security and space control. Inward-opening gates also avoid swinging into sidewalks or roads. However, choose what works best for your yard layout and traffic flow needs.
How do I install double gates in a fence?
To install double gates, use two sturdy posts set in concrete. Hang each gate panel with strong hinges, add a latch, and use a drop rod or cane bolt to keep one side secured when not in use.
What are the best ways to improve the security of my fence gate?
Install a heavy-duty latch secured with a padlock or keyed lock. Strengthen the hinge screws and place gate stops to manage how far the gate opens. For extra security, consider using metal hardware or smart gate locks for controlled access.
Conclusion
Installing a gate in your fence is a simple project that adds real value to your property. With the help of this easy-to-follow guide, you now understand how to install a gate in a fence the right way. It improves your home’s function, safety, and overall appearance.
EDM Garage Doors, LLC is committed to providing dependable help for homeowners working on their home improvement projects. While this guide focused on fence gates, we also specialize in quality garage services. If your garage door is giving you trouble, we proudly offer expert garage door repair & gate services in Volo, Illinois, for lasting results you can count on.
Now that your gate is installed and working well, you can enjoy both the convenience and satisfaction it brings. If you are thinking about your next home project, whether it is maintenance or repair, feel free to reach out to EDM Garage Doors, LLC for trusted, local service and advice.
End Note
Looking for trusted home improvement services that go beyond gate installation? Visit EDM Garage Doors, LLC for expert help you can count on. We offer full garage door services, including fast emergency repairs, broken spring replacement, and complete garage door repairs. Our experienced team is ready to handle any issue with care and precision.
Need help with gates? We provide gate installation, gate repair, gate maintenance, and top-quality gate openers to keep your property secure and easy to access. Searching to upgrade your home’s look? Browse our stylish door collection, like our trusted Amarr doors. We also carry commercial openers, including premium LiftMaster models built to last.
Get to know us better through our About Us page, explore our past projects in the gallery, or read useful tips on our blog posts. Need help fast? Find answers on our FAQs or check if we serve your area at Service Areas. Reach out today through our Contact Us page or follow us on Facebook, Instagram, and YouTube to stay connected.
EDM Garage Doors, LLC
Volo, IL 60073
+18474163036