Avoid frustration with our no-fail guide on installing vinyl fence gates in Volo, Illinois: Get perfect results with our easy-to-follow instructions and tips.
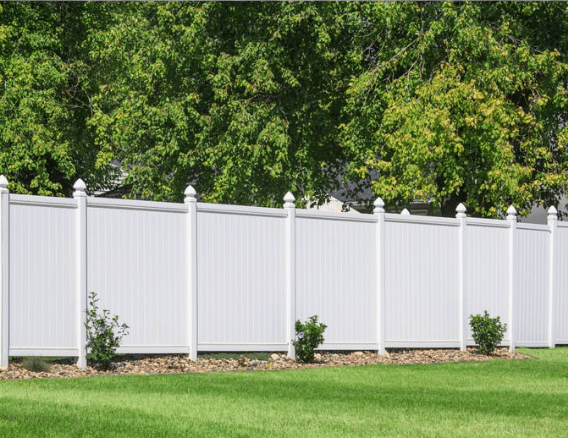
Vinyl fencing offers a durable, stylish, and low-maintenance solution for homeowners in Volo, Illinois, aiming to enhance curb appeal and privacy. Learning how to install a vinyl fence gate properly is essential for achieving lasting functionality and elegance. Working with EDM Garage Door LLC in Volo, Illinois ensures professional results.

This guide provides step-by-step instructions on how to install a vinyl fence gate effectively in Volo, Illinois. From gathering materials to setting posts and attaching gate hardware, we cover it all. You’ll also discover helpful tips, common mistakes to avoid, and maintenance practices. Trust EDM Garage Door LLC in Volo, Illinois for expert guidance.
Why Choose Vinyl Fence Gates in Volo, Illinois?
Vinyl fence gates have gained immense popularity among homeowners in Volo, Illinois, and it’s no surprise why. Unlike wood or metal, vinyl offers a range of benefits that perfectly suit the diverse needs of Volo residents. Here’s why it’s a top choice:
Durability and Weather Resistance
Volo, Illinois, experiences all four seasons, from hot and humid summers to freezing winters. Vinyl fencing is highly resistant to extreme weather conditions, preventing warping, rotting, rusting, or insect damage.
Low Maintenance
One of the biggest advantages of vinyl fence gates is their low maintenance. You won’t need to stain, paint, or treat them like wood. Occasional cleaning with soap and water is enough to keep them looking pristine.
Stylish and Versatile

Vinyl fence gates come in various styles, colors, and designs, allowing you to match them perfectly with your home’s architecture and landscaping. Whether you prefer classic white picket fences or modern privacy panels, vinyl offers endless possibilities.
Easy Installation
Unlike other materials, vinyl gates are designed for simple installation. Even as a DIY project, with the right tools and guidance, you can install a beautiful, sturdy vinyl fence gate within a couple of days.
Cost-Effective
Although the upfront cost may be higher than wood, vinyl gates save money in the long run due to minimal maintenance and longer lifespan.
Tools and Materials Needed

Before diving into the installation process, you’ll need to gather the following tools and materials to make the job easier and more efficient.
Tools:
- Tape Measure
- Post Hole Digger
- Level
- Drill
- Screwdriver
- String Line
- Circular Saw (if adjustments are needed)
- Rubber Mallet
- Pencil or Marker
Materials:
- Vinyl Fence Gate Kit (including hinges, latch, and hardware)
- Vinyl Fence Posts
- Concrete Mix (for securing posts)
- Gravel (for drainage)
- Screws
- Brackets
- Gate Stop (optional)
- Protective Gloves and Safety Glasses
Pre-Installation Considerations
Before starting the installation process, there are several crucial steps you need to take. Ensuring these are completed will save you time, effort, and potential legal issues.
Check Local Regulations and Permits
In Volo, Illinois, zoning laws and homeowners’ association (HOA) regulations may affect your ability to install a vinyl fence gate. Some neighborhoods have restrictions on fence height, design, and placement.
To avoid fines or being forced to remove your fence, always check with the Village of Volo’s Building Department or your HOA. You may also need a permit if your fence exceeds certain height restrictions.
Mark Your Property Lines

Installing a fence on a neighbor’s property by mistake can cause disputes. Ensure you accurately mark your property lines before you begin. You can hire a surveyor if you’re unsure about your boundaries.
Call Before You Dig
Before you start digging, contact the Illinois One-Call System (JULIE) by dialing 811 at least two business days before your project. This free service ensures you won’t damage underground utilities like gas, water, or electrical lines.
Plan Your Layout
Measure the area where your vinyl fence gate will be installed. Mark the locations for your fence posts, ensuring the gate opening is wide enough for its intended use, whether for pedestrian access or vehicle entry.
Step-by-Step Guide to Install Vinyl Fence Gate in Volo, Illinois
Installing a vinyl fence gate may seem challenging, but following the right steps can make it a smooth and satisfying process. Here’s a comprehensive breakdown:
Step 1: Prepare Your Posts
Proper preparation of your posts is the foundation of a successful fence gate installation.
a. Digging the Post Holes
- Use a post-hole digger to create holes where your gate posts will be installed.
- The holes should be at least 30 inches deep and 6–8 inches wide.
- The depth is critical in Volo, Illinois, due to freezing temperatures that may cause shallow posts to shift over time.
- Pour about 6 inches of gravel at the bottom of each hole to enhance drainage and prevent water accumulation.
b. Positioning the Posts
- Insert the posts into the holes, ensuring they are perfectly vertical using a level.
- Position them carefully, keeping in mind the desired width of your gate.
- Tip: Use a string line between posts to ensure they are aligned properly.
Step 2: Set the Posts
Once your posts are properly positioned, it’s time to secure them in place.
a. Mixing and Pouring Concrete
- Mix concrete according to the manufacturer’s instructions.
- Pour the concrete around the base of each post, leaving approximately 2 inches of space from the top.
- This allows for the addition of dirt or gravel for better drainage.
b. Leveling and Securing
- Continuously check that the posts remain level during the pouring process.
- Adjust as needed before the concrete begins to harden.
- Allow the concrete to cure for at least 24 hours before moving to the next step.
- Pro Tip: Cover the concrete with plastic if rain is expected during the curing process.
Step 3: Attach the Gate Hinges
Once the posts are firmly set, you can proceed to attach the hinges.
a. Marking the Hinge Locations
- Place your vinyl fence gate against the posts where it will be mounted.
- Mark the locations where the hinges will be attached on both the gate and the post.
b. Drilling Pilot Holes
- Pre-drill holes for the screws to avoid cracking or damaging the vinyl.
- Ensure the holes are slightly smaller than the screws to maintain a tight fit.
c. Securing the Hinges
- Attach the hinges to the gate using a screwdriver or drill.
- Then, secure the hinges to the gate post.
- Ensure the gate swings freely and smoothly before tightening all screws completely.
Step 4: Install the Latch and Gate Stop
Having a proper latch system is essential for security and functionality.
a. Attaching the Latch
- Position the latch on the opposite post from where the hinges are installed.
- Mark and drill pilot holes before securing the latch with screws.
- Ensure the latch lines up perfectly with the gate’s locking mechanism.
b. Installing a Gate Stop (Optional)
- A gate stop helps prevent the gate from swinging too far, which could damage the hinges or posts.
- Install the stop on the post where the latch is located if desired.
Step 5: Test the Gate
Before securing everything, it’s essential to ensure your gate functions properly.
- Open and close the gate multiple times to ensure it swings smoothly.
- If the gate drags or fails to align properly, adjust the hinges or screws as needed.
- Make sure the latch mechanism works without resistance.
Step 6: Secure the Gate
Now that the gate operates smoothly, it’s time to make everything permanent.
- Tighten all screws and fittings to ensure they’re securely fastened.
- Add extra gravel around the posts if needed for added stability.
- Consider applying a vinyl protectant to keep your fence looking new.
Common Mistakes to Avoid
No matter how prepared you are, mistakes can happen. Here’s how to avoid the most common pitfalls when installing a vinyl fence gate in Volo, Illinois.
1. Ignoring Local Regulations
Failing to check with your HOA or local municipality can lead to costly fines and forced removal. Always research your area’s rules before beginning installation.
2. Incorrect Measurements
Taking inaccurate measurements can cause your gate to be misaligned, creating functional and aesthetic issues. Double-check all measurements before you begin drilling or pouring concrete.
3. Rushing the Concrete Curing Process
Concrete takes time to set properly. Moving the posts before the concrete fully cures can cause structural instability. Give it a full 24–48 hours to cure before proceeding.
4. Using Inadequate Tools
Trying to install a vinyl fence gate without the proper tools can lead to frustration and poor results. Make sure you have everything you need before starting.
5. Not Using Gravel for Drainage
Skipping the gravel layer at the bottom of the post holes can lead to water pooling, which may cause premature rotting or shifting of the posts.
Maintenance Tips for Vinyl Fence Gates
Your vinyl fence gate may be low maintenance, but it still requires some care to keep it in top shape. Here’s how to maintain it:
1. Regular Cleaning
- Wash your gate with mild soap and water to remove dirt, dust, and debris.
- Avoid harsh chemicals that can degrade the vinyl’s quality.
2. Inspect Hardware Regularly
- Check hinges, latches, and screws for signs of wear or rust.
- Tighten or replace hardware as needed to maintain functionality.
3. Avoid Harsh Treatments
- Never use abrasive cleaners or sharp tools to clean your fence.
- Regularly inspect the fence for cracks or damage and repair promptly.
4. Apply Vinyl Protectant
- Use vinyl protectants designed to resist UV damage and maintain the fence’s appearance.
Frequently Asked Questioned
How do you secure a vinyl fence gate?
To secure a vinyl fence gate, use high-quality, rust-proof hinges and latches designed for vinyl fences. Install a durable gate latch that locks securely, such as a gravity latch or key-lockable latch. Additionally, use a gate brace or anti-sag kit to maintain alignment and prevent sagging.
How to install a vinyl fence step by step?
- Plan and Measure: Outline your fence line and measure accurately.
- Dig Post Holes: Dig holes at regular intervals, ensuring proper depth and spacing.
- Set Posts: Install posts with concrete for stability.
- Install Panels: Attach panels to posts securely.
- Install Gate: Attach the gate with appropriate hardware.
How do I add a gate to an existing vinyl fence?
To add a gate to an existing vinyl fence, choose a gate kit compatible with your fence style. Remove a section of the fence and install new posts with concrete. Attach the gate to the posts using durable hinges and latches. Ensure the gate aligns with the existing fence panels for a seamless look.
How do you raise a vinyl fence gate?
To raise a vinyl fence gate, adjust the hinges by loosening them and realigning the gate. If sagging is an issue, install an anti-sag gate kit. In some cases, replacing worn-out hardware or adding a bottom support brace may be necessary to keep the gate properly aligned.
How much gap does a vinyl fence gate need?
A vinyl fence gate needs a gap of about 1 to 2 inches between the gate and the post. This allows the gate to swing freely and prevents damage from expanding vinyl in hot weather. Ensure the latch system can accommodate this gap while securely locking the gate.
Final Thoughts
Installing a vinyl fence gate in Volo, Illinois, can be a rewarding project for homeowners. By taking the time to prepare, gather the right tools, and follow the steps carefully, you can achieve a professional-looking result. Not only will this improve the curb appeal of your property, but it will also add value and privacy.
With patience and attention to detail, installing a vinyl fence gate is entirely achievable. Be sure to follow safety precautions and consult expert resources to guide you throughout the process. This DIY project will not only enhance your property’s functionality but also provide a durable, low-maintenance solution that will last for years to come.
End note
EDM Garage Doors is your trusted partner for all garage door needs. From custom designs to expert repairs, we offer a variety of services to meet your requirements. Visit our About Us page to learn more about our mission, and discover our range of solutions at EDM Garage Doors.
Explore our full array of services, including Artisan Custom Doorworks and Genie Openers, to enhance your garage door experience. We proudly serve various regions, which you can learn about on our Service Areas page. For inquiries, feel free to Contact Us, and connect with us on Facebook.